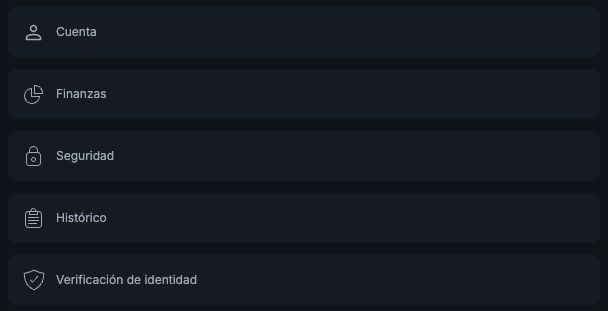
Identity verification confirms your account details. Your KYC must be approved before you can request withdrawals. Submitting information is one step in the process; it does not mean immediate approval.
Open the verification area
- Open Perfil (Profile) in the bottom menu of the compact layout or through the user icon in the wider layout.
- Select Verificación de identidad (Identity verification).
- Check Datos personales (Personal details): name, nationality, date of birth and phone number. To correct personal details, contact support and complete the identity check they request. See how to correct inaccurate personal details.
Enter your document details
You can use your national identity document or passport. Check the available upload options and see which documents are accepted for identity verification if you are unsure.
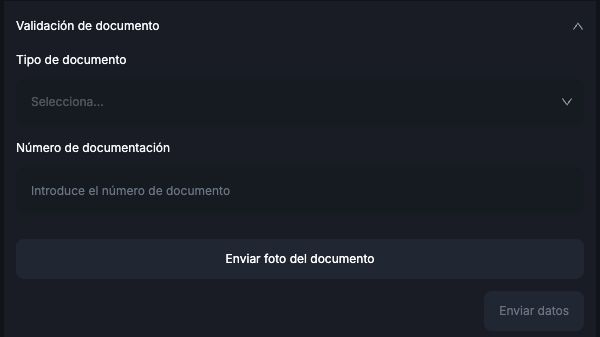
- Expand Validación de documento (Document validation).
- Open Tipo de documento (Document type) and select the option matching the document requested for your account. In the Colombian account used for the screenshots, the selector displayed ID.
- Complete Número de documentación (Document number) with the number of the document you will upload.
If you do not know which document matches the available option, check with support before continuing. Do not choose a different document type just to move forward.
Prepare the images
- Select Enviar foto del documento (Upload document photo).
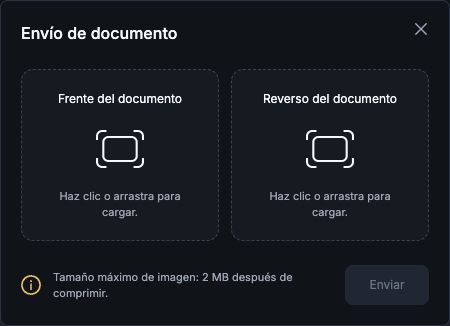
- In the Envío de documento (Document upload) window, use Frente del documento for the front and Reverso del documento for the back.
- Click each area to choose a file, or drag the matching image into it. Check that each side is in the correct place.
- Use clear images with all edges visible and no cropping or glare that hides information. The screen states a limit of 2 MB per image after compression.
- Check the files before selecting Enviar (Send). In the main form, also check submission of your details through Enviar datos (Send details), when available, and follow the platform's instructions.
Check progress and review time
KYC review can take up to 72 hours. This is the review period, not a guarantee of approval. During that time, check the status in the verification area and look for any requests to correct information.
Read the platform's response and return to the verification area to check the status. Only consider this step complete when your account shows approval. If your document is rejected, see how to correct a rejected document submission before trying again. If 72 hours pass and the review is still pending, contact support.
If you cannot upload the files, do not understand the message or need to correct a locked field, email support@worbit.io. Do not submit someone else's document.
Next step: withdrawals also require Google Authenticator to be enabled and your email address to be confirmed. Then see how to request a withdrawal.